You’ve got a beautiful design idea and you’re ready to share it with the knitting world. But here’s the thing: even the most stunning sweater or ingenious stitch pattern won’t create a repeat customer if knitters can’t follow your instructions. High-quality patterns are the difference between customers who rave about your work and those who leave frustrated reviews.
Creating patterns that knitters love goes beyond just writing down rows and stitches. It’s about clear communication, thoughtful presentation, and anticipating where knitters might get confused. A well-crafted pattern becomes a trusted guide that helps makers successfully bring your vision to life.
Writing Pattern Instructions for Knitters
The foundation of any great pattern are crystal-clear instructions. Your job is to guide knitters through each step without leaving them guessing or rereading the same line five times.
Clear and Concise Language
Write instructions the way you’d explain them to a friend sitting across from you, but remember that patterns, like recipes, follow standard approaches and terminology that make them universally understandable. Use straightforward language and stick to industry-standard knitting terms. When you do need to use technical terminology, make sure it’s recognized within the knitting community.
Before writing your first pattern, take time to review well-written patterns from trusted resources like Vogue Knitting. This helps you understand the industry-expected approach, which is especially important if you plan to collaborate with brands or submit patterns for publication. Your pattern should feel conversational and supportive while maintaining professional standards.
Every word should earn its place. If you can say something in fewer words without losing clarity, do it. “K2tog” is clearer than “knit the next two stitches together as one stitch.” Save the detailed explanations for your abbreviations, techniques, and notes sections so you can keep row-by-row instructions tight and easy to follow.
Logical Flow of Steps
Your pattern should guide knitters smoothly from cast-on to bind-off. Each section should flow naturally into the next, with clear transitions that help knitters understand where they are in the project.
Start with a materials list and any important notes, then move into the actual knitting. Break complex FOs, like sweaters, into manageable sections: body, sleeves, finishing. This way knitters can tackle one piece at a time without feeling overwhelmed. If your pattern involves multiple pieces that get assembled later, make that clear from the start so knitters can plan their approach.
Explaining Complex Stitches and Techniques
Not every knitter who loves your design will know every technique you’ve used. And some techniques can be done multiple ways. Saying “bind off” can mean many things. If your pattern requires a stretchy bind off, for example, you need to specify that clearly. When you introduce a special stitch or non-standard technique, take a moment to explain it.
Create a techniques section before your main instructions where you break down anything that might trip up intermediate knitters. Include stitch counts in parentheses after complex rows so knitters can check their work. If a technique is particularly tricky, consider adding a note about what the fabric should look like at that stage. This helps knitters confirm they’re on the right track without needing to count every stitch.
Adding sidebars with technique tips or linking to video tutorials can significantly increase your pattern’s value and build trust with customers. These extras show you’re invested in their success and set your patterns apart from competitors who only provide basic instructions.

Formatting Your Knitting Pattern for Clarity
Even perfect instructions can confuse readers if they’re formatted poorly. Good formatting helps knitters navigate your pattern quickly and find information when they need it.
Using Headings and Subheadings
Break your pattern into clear sections with descriptive headings. “BODY,” “SLEEVES,” “FINISHING.” These simple labels help knitters orient themselves and find their place when they set the pattern down and pick it back up later.
Use subheadings within sections when needed. If your body section includes different instructions for multiple sizes, bold subheadings like “Sizes XS-M” and “Sizes L-2X” make it easy for knitters to jump to their relevant instructions without wading through information that doesn’t apply to them.
Remember to use the CYC’s Standards and Guidelines for Crochet and Knitting when building your pattern.
Creating a Clear Visual Hierarchy
Your pattern should guide the eye naturally through the information. Use formatting consistently so knitters can scan the page and immediately understand what they’re looking at.
Make size-specific information stand out. Whether you use bold text, different colors, or brackets, pick a system and stick with it throughout the pattern. Many designers bold the numbers for the smallest size and put larger sizes in parentheses: “Cast on 80 (90, 100, 110) sts.”
Important notes deserve visual emphasis. A boxed note or different font treatment helps critical information catch the eye. If changing needle size will affect gauge significantly, or if a technique must be done a specific way, make sure that information doesn’t get lost in the text.
Choosing Fonts, Sizes, and Styling
Designers are creative people but when laying out your pattern you have to choose readability over creativity every time, especially when it comes to pattern fonts. Choose a clean, professional font that’s easy to read at various sizes. Your main instructions should be large enough to read comfortably.
Use italics for notes and clarifications, bold for emphasis on critical information, and reserve ALL CAPS for major section headings. Too much styling creates visual noise that makes patterns harder to follow. When in doubt, simpler is better.
Using White Space Effectively
Cramming information onto fewer pages might seem efficient for printing, but it makes patterns harder to use. White space gives knitters’ eyes a place to rest and helps break information into digestible chunks.
Add space between sections and around important notes. If you’re including both written instructions and charts for the same section, separate them clearly so knitters don’t accidentally read the wrong format. Line spacing matters too! Cramped text is exhausting to read.
Remember, you only have to do this work once. Once you’ve found a pattern layout that works for you, turn that into a template and use it as the base for all of your patterns going forward.
Crystal Marin
Britt G.

Chantal
Olga
Enhancing Your Pattern with Visuals: Photos, Diagrams, and Charts
Words alone don’t always capture what a finished piece should look like or how a technique should be executed. Strategic visuals transform good patterns into great ones.
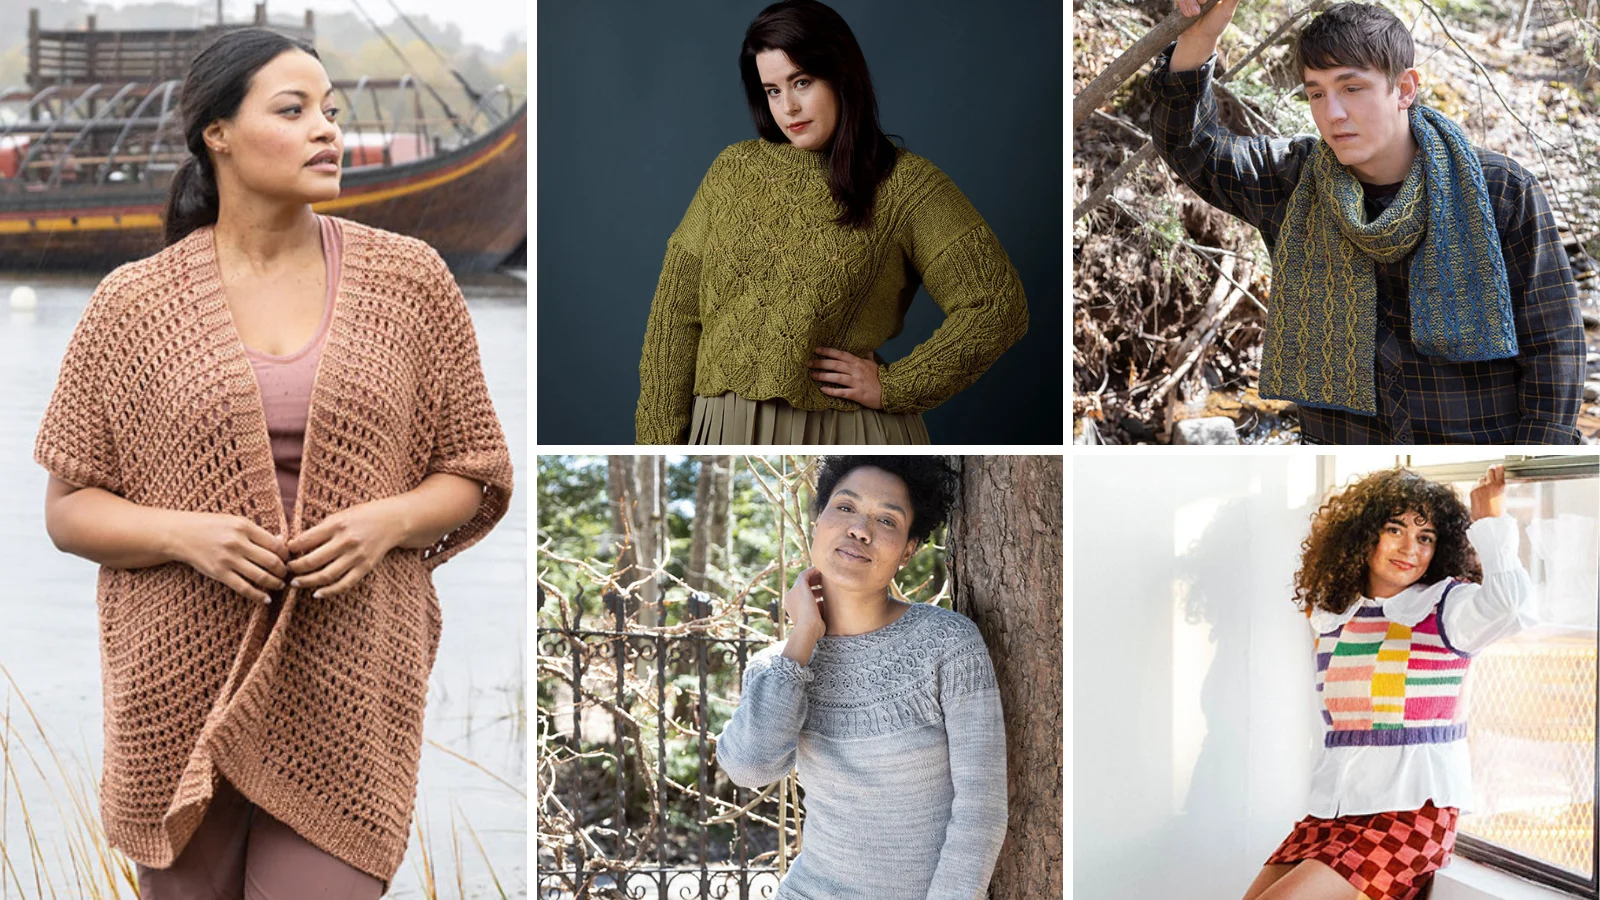
The Power of Good Photography
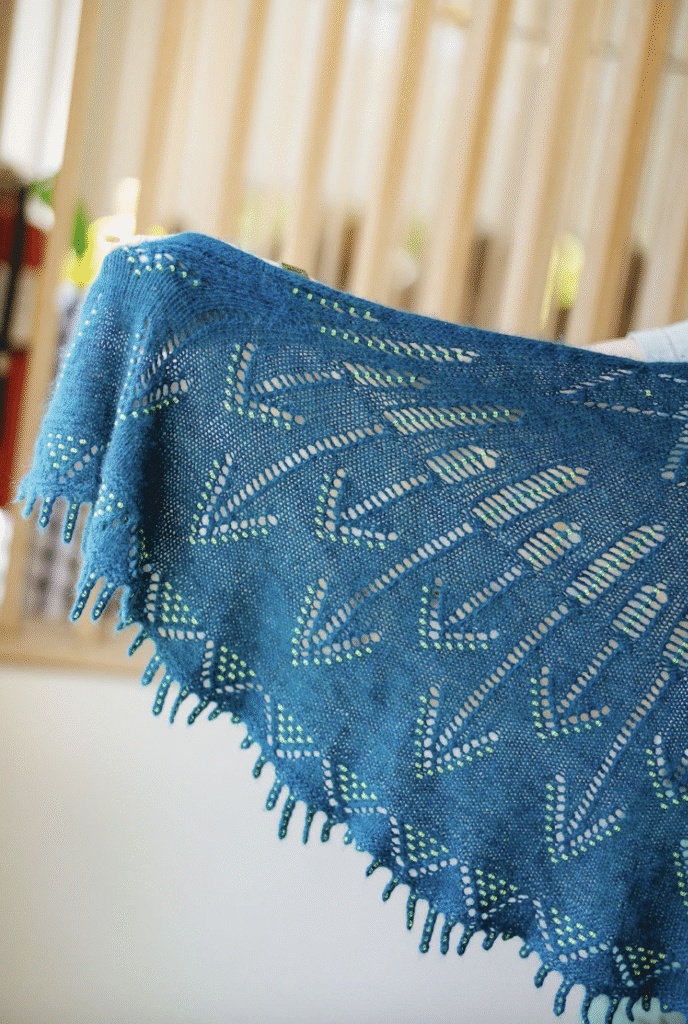
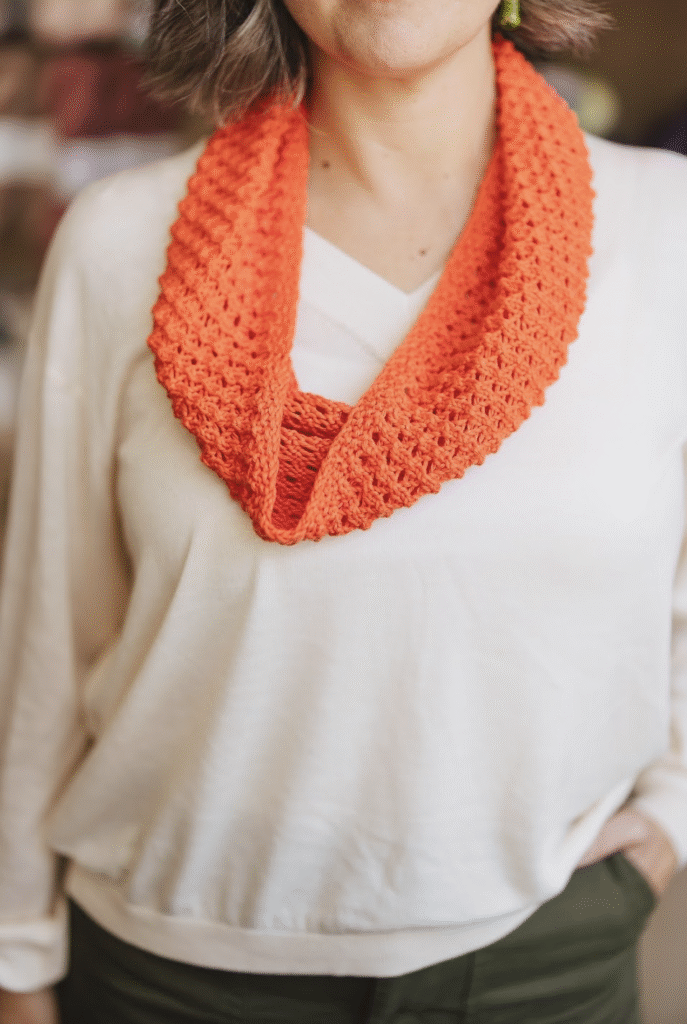
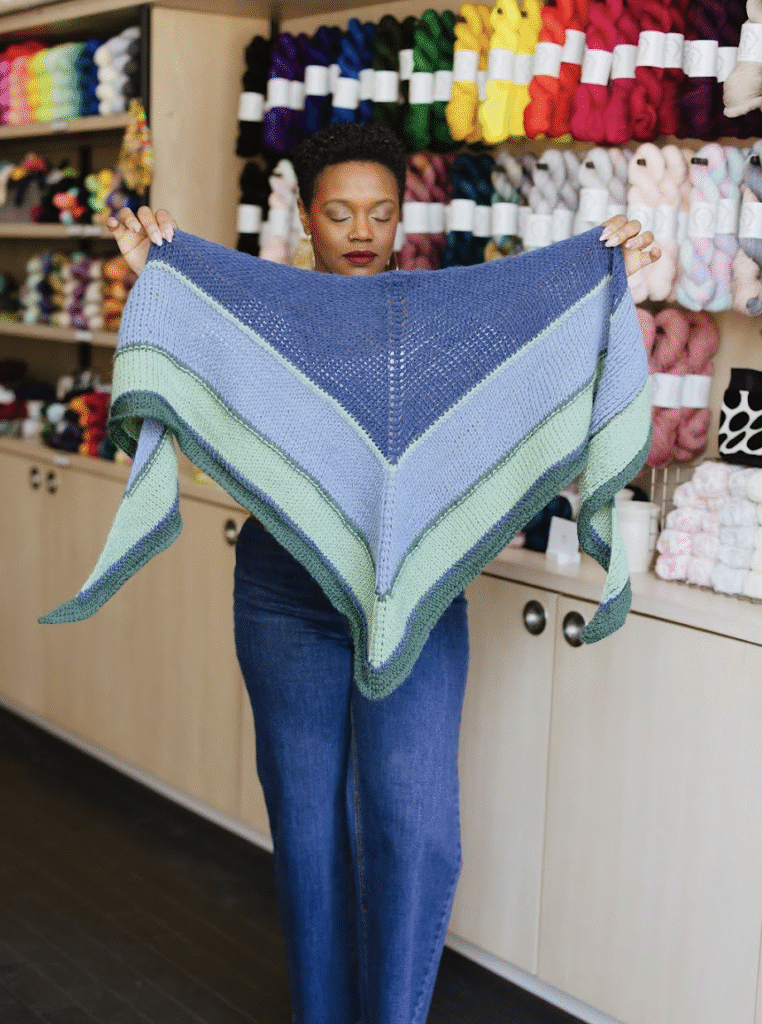
Photos sell your pattern and help knitters visualize the finished project. Include multiple angles of the finished piece: front, back, and detail shots of special stitches or construction elements. Show the garment being worn if possible, so knitters can see how it drapes and fits.
Step-by-step photos can be invaluable for complex techniques. A photo of how to pick up stitches along a curved neckline or how your short rows should look can prevent hours of frustrated frogging and customer service emails.
You don’t need professional photography equipment to create professional level photography. Here’s our guide to get help you get started: Photography Tips For Designers.
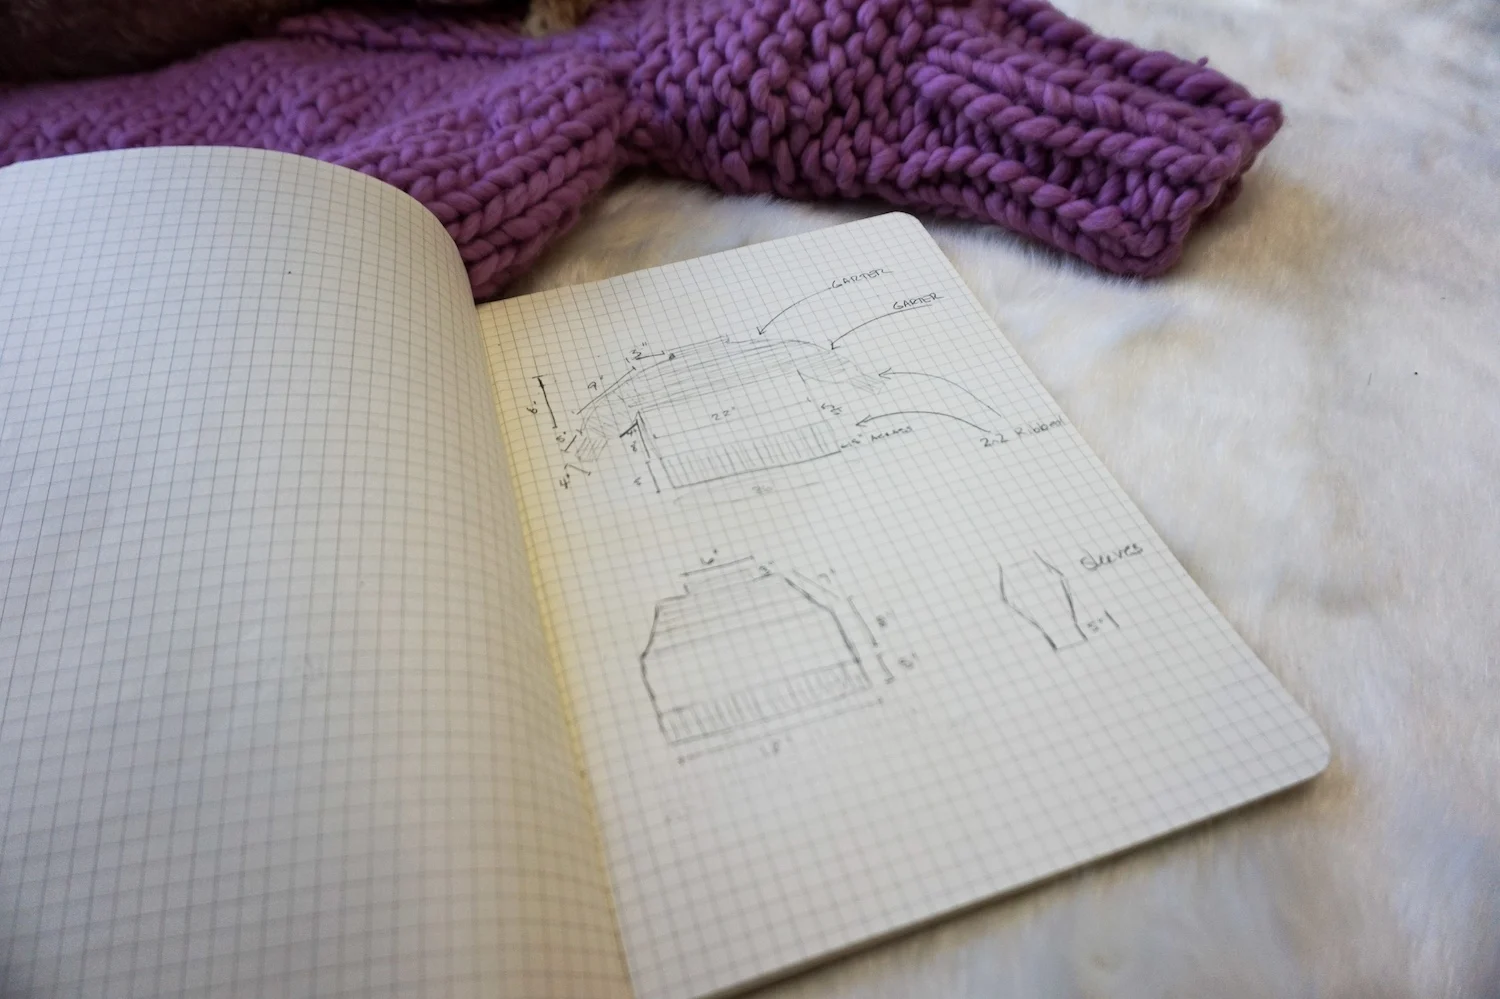
When to Use Diagrams
Schematics are essential for garments. A flat diagram with measurements helps knitters understand the shape and proportions before they start, and serves as a reference throughout the project. Include measurements for all sizes you’re offering, clearly labeled.
Construction diagrams show how pieces fit together, which is especially helpful for projects with unusual construction methods. If your sweater is knit sideways, for example, a simple diagram can clarify what words might struggle to explain.
Creating Useful Charts
Charts are a knitter’s best friend for colorwork, lace, and cable patterns. They provide a visual representation of the fabric that’s often easier to follow than row-by-row written instructions. If your pattern includes charted sections, always include a key that explains every symbol.
Many knitters prefer charts, while others prefer written instructions. When possible, provide both. This makes your pattern accessible to more knitters and lets each customer work in the format they find most comfortable. Just make sure both versions produce identical results by testing them both thoroughly and independently.
Testing and Refinement & Community Feedback
Even experienced designers need fresh eyes on their patterns. Testing and feedback transform patterns from “pretty good” to “customers can’t wait to buy my next design.”
The Importance of Pattern Testing
Your test knitters, who try out your draft pattern, before it’s released to the public, will catch errors you’ve looked at a hundred times without seeing. As a fresh set of eyes, they’ll find confusing instructions, spot missing stitch counts, and identify places where your logic made sense to you but baffles everyone else.
How to Find Good Test Knitters
Look for test knitters who represent your target audience. If you’re designing an advanced lace shawl, you need experienced test knitters who know lace construction. For a beginner-friendly baby blanket, testers newer to knitting will better represent your customers.
Recruit multiple testers working different sizes if you’re offering a range. Size grading errors often only show up when someone actually knits the larger or smaller sizes. Post in testing groups on Ravelry, reach out to your social media followers, or join designer communities where testers and designers connect.
Using Feedback to Improve Your Pattern
When testers report issues, listen carefully. If one person finds a section confusing, others will too. If multiple testers stumble at the same place, that section needs revision. Sometimes the fix is simple. Adding one clarifying sentence or moving a note to a more prominent position can save you hours of time in the long run.
Test knitters often suggest improvements you hadn’t considered. Maybe they’d love to see the pattern include a photo tutorial for a tricky section, or they think adding a chart would make the lace easier to follow. Not every suggestion requires implementation, but patterns always improve when designers stay open to feedback.
Knit the pattern yourself if you haven’t already. There’s no substitute for working through your own instructions with fresh eyes. You’ll catch things even good testers might miss, and you’ll have a finished sample for photography.
Creating Knitting Patterns That Sell
You’ve designed something beautiful and written clear instructions. Now let’s make sure your pattern stands out in a crowded marketplace.
The Elements That Make Patterns Successful
Great patterns combine technical clarity with personality. Your unique voice and design aesthetic should shine through while maintaining professional standards. Knitters buy from designers whose style resonates with them, so don’t be afraid to let your personality show in your writing.
Accurate information builds trust. Double-check every number, every stitch count, every measurement. A single error can erode confidence in your work and lead to returns or negative reviews. Proofread thoroughly, have someone else proofread again, and then check one more time.
Implementing These Tips in Your Design Process
Start building these practices into your workflow from the beginning. As you design, think about how you’ll explain each element. Take notes while you’re swatching and developing the pattern. These notes will become the foundation for your written instructions.
Create a template for your patterns that includes all the standard sections in a consistent order. This saves time and ensures you don’t forget important elements like gauge information or yarn substitution notes. As you refine your template based on customer feedback and your own experience, your patterns will become stronger and more professional.
What’s Next
Creating high-quality knitting patterns takes practice, but every pattern you write will be better than the last. When you create patterns that help makers succeed, you’re building a business that thrives on happy customers who can’t wait to see what you design next.